The standard before-and-after photographs of dental patients are taken primarily to create a clear visual record of the patient and their treatment outcomes, and dentistry has traditionally followed the suggested standard guidelines of lighting, composition, magnification, orientation, retraction, and mirror use.
But one dental practitioner who has more than a passing interest in photography maintains that, in this day and age, creating patient images is about much more than simple record keeping -- it is visual storytelling.
"Dental photography has to change because the world of visual communication has changed," James Dunn, DDS, an Auburn, CA, dentist and former professor at Loma Linda University, told DrBicuspid.com. "Patients do not like ugly pictures, but dentists are not good photographers by trade."
“Patients do not like ugly pictures.”
— James Dunn, DDS
He and Richard Young, DDS, assistant professor of restorative dentistry at Loma Linda University School of Dentistry, give seminars and hands-on courses about photography and recently authored a series on dental photography in Chairside Magazine. They contend that highly effective photographs that convey a visual dental message can communicate more effectively with patients, specialists, and dental labs and can be used in presentations, publications, and marketing.
"Ansel Adams said there are always two people in every picture: the photographer and the viewer," Dr. Dunn said. "But we as dentists usually only think about the first one, not the second one. We know that if you take a ring light image of a row of teeth, it is an arch. And as dentists we are so proud of our anterior crowns that we take the cheeks back and then we show the patient. ... What Dr. Young and I are trying to get away from is the idea that the photographer is the only important thing. The viewer is important too."
The first step in improving patient photographs is to think less like a clinician and more like an artist, he added.
"Whether we like it or not, the quality of our photographs is seen as representing our quality as dental practitioners," he and Dr. Young wrote in Chairside.
The challenge for many practitioners is how to evolve from static, record-based photography to dynamic, artistic photography that can be managed within the realm of the dental office and the dental practice.
"You just have to understand that someone else is looking at your picture and you are trying to tell them something," he said. "Just as you would write a well-crafted sentence, you need to get rid of the excess language and get right to the point."
Proper lighting is key
This concept is not revolutionary and does not require special equipment, Dr. Dunn noted. A quality single-lens reflex (SLR) digital camera with attached macro lens and macro flash or a point-and-shoot camera with a close-up attachment will suffice; suggested accessories include cheek retractors, mirrors, contrasters, and on- and off-camera flashes.
"Each of these accessories allows for better framing and isolates distracting anatomy in dental photographs," Drs. Dunn and Young wrote in Chairside. "Using these accessories effectively may require additional hands, but they will enhance the attractiveness of the photograph."
While good equipment is good, Dr. Dunn noted, "the eye of the photographer is more important."
And proper lighting is key, even for record-keeping images taken during an initial exam.
"Macro lights were made for stamps, coins, and bugs, not teeth, smiles, or faces," he said. "So instead of a ring light, I use a device that emphasizes the 3D aspect. We then use lighting and black obstructions to block out the things that are not relevant to what we want to show. If you take a picture of anterior teeth, the worst thing in the world is to show the tongue or palate. And on a maxillary picture, many times the nose is showing, and this is very unattractive. The goal is to use lighting to give a perception of a model."
Dr. Dunn also recommends taking portraits that harken back to the old Hollywood black and white glamour shots, versus the standard dental portraits that end up looking more like mug shots.

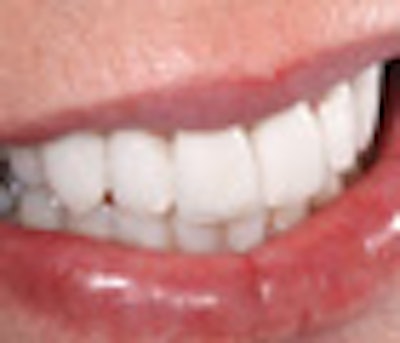
 Left: A straightforward image of a patient's smile. Right: A "glamorized" version of the same smile. All images courtesy of Dr. James Dunn.
"I am amazed, I don't care what the age, but patients know what is pretty," he said.
Taking good portraits
The challenge is to take the portrait within the confines of the dental office, where lighting and shadowing can be an issue, Dr. Dunn noted. He recommends using a black background, preferably duvetyne, a velvet-like theatrical cloth used in staging for light control. He also recommends a white ceiling or using a large white reflector as a false ceiling.
 A nonreflective black background can help create studio-like portraits -- even in the dental operatory.
"The key is you can do the picture in the chair," Dr. Dunn said. "You take a foam board covered in duvetyne and put it behind the patient's head, then pose them. We have also simplified the lighting to a single light flash on the camera with a diffuser and a reflector, and we get about 80% of what a regular portrait studio would look like."
Dental photographs can be effective when taken as "snapshots," but become attractive communication tools when taken following established guidelines of general photography and art, he noted.
"I have heard so many patients say, ‘Oh, wow,' " Dr. Dunn said. "It seems like a trite statement, but when you take a picture of a smile and then turn them a little and put more glamour lighting on it ... and we never show a picture after treatment that isn't framed by the lips. Because what does the patient see?"
Dr. Dunn is also a proponent of annotating digital images to further enhance their value.
 Annotating digital photos can enhance communication with specialists, labs, and even patients.
"When you combine images and words, you have a very potent communication tool," he said. "Laboratories are given a clear direction to follow, and specialists have a clear idea of what you are requesting or want for your patient. So we compose the picture purposely, then add the annotation."
Annotating digital photographs requires either a tablet PC (not an iPad) with built-in graphic functions or a graphics tablet attached to your computer, Dr. Dunn noted.
"In dentistry, we just keep plugging along with our old pathology pictures," he said. "But visual imaging is making sure that what you see is what whoever is going to look at the picture will see. You have to get outside the realm of dentistry and think ‘Oh, somebody is going to see this' and ask yourself, ‘What is the story I want to tell them?' "
For more detailed information about equipment, settings, lighting, patient positioning, and portrait photography, see "Dental Photography: A New Perspective," in the Summer and Fall 2011 issues of Chairside Magazine.


